[NestJS + NextJS] Building Real-Time Collaboration with WebSocket
Hi there! In this post, I’ll walk you through the process of building a simple real-time Markdown editor. This project leverages NestJS for WebSocket integration and NextJS with markdown-it for Markdown parsing and rendering.
Let’s dive in! 🚀
Step 1. Project Overview
Objective:
- A simple project created to practice WebSocket implementation.
- Enable multiple users to collaboratively edit a Markdown document in real time on the same page.
Step 2. Introduction to WebSocket
A WebSocket is a communication protocol that provides full-duplex communication channels over a single TCP connection. It enables real-time, event-driven connection between a client and a server.
Step 3. Implementation Process
3.1 Backend: WebSocket Server with NestJS
- Set up NestJS and Install Dependencies
1
2
3
4
 nest new markdown-collab
 npm install @nestjs/websockets @nestjs/platform-socket.io socket.io redis
 npm install --save-dev @types/socket.io
 npm install class-validator class-transformer
Create a WebSocket Gateway
1
2
3
4
5
6
7
8
9
10
11
12
13
14
15
16
17
18
19
20
21
22
23
24
25
26
27
28
29
30
31
32
33
34
35
36
37
38
39
40
41
42
43
44
45
46
47
48
49
50
51
52
53
 import {
   WebSocketGateway,
   WebSocketServer,
   OnGatewayConnection,
   OnGatewayDisconnect,
   SubscribeMessage,
   MessageBody,
   ConnectedSocket,
 } from '@nestjs/websockets';
 import { Server, Socket } from 'socket.io';


 @WebSocketGateway({ cors: true })
 export class CollabGateway implements OnGatewayConnection, OnGatewayDisconnect {
   // WebSocket server instance
   @WebSocketServer() server: Server;

     // Map to store document content by document ID
   private documents: Map<string, string> = new Map();

   // Triggered when a client connects to the server
   handleConnection(client: Socket) {
     console.log(`Client connected: ${client.id}`);
   }

   // Triggered when a client disconnects from the server
   handleDisconnect(client: Socket) {
     console.log(`Client disconnected: ${client.id}`);
   }

   // Handle the 'join-document' event, allowing a client to join a specific document room
   @SubscribeMessage('join-document')
   handleJoinDocument(
     @MessageBody() data: { docId: string }, // Extract the document ID from the message body
     @ConnectedSocket() client: Socket, // Access the connected socket
   ) {
     client.join(data.docId); // Join the specified document room
     const content = this.documents.get(data.docId) || ''; // Retrieve the document content or default to an empty string
     client.emit('document-content', { content }); // Send the current document content back to the client
   }

   // Handle the 'edit-document' event, updating the document content and notifying other clients in the same room
   @SubscribeMessage('edit-document')
   handleEditDocument(
     @MessageBody() data: { docId: string; content: string }, // Extract the document ID and new content from the message body
     @ConnectedSocket() client: Socket, // Access the connected socket
   ) {
     this.documents.set(data.docId, data.content); // Update the document content in the Map
     this.server
       .to(data.docId) // Broadcast to all clients in the specified document room
       .emit('document-updated', { content: data.content }); // Notify clients with the updated document content
   }
 }
3.2 Frontend: Real-Time Updates with React
- Set up NextJS and Install Dependencies
1
2
 npx create-next-app@latest markdown-editor
 npm install socket.io-client markdown-it
Initialize WebSocket in React
1
2
3
4
5
6
7
8
9
10
11
12
13
14
15
16
17
18
19
20
21
22
23
24
25
26
27
28
29
30
31
32
33
34
35
36
37
38
39
40
41
42
43
44
45
46
47
48
49
50
51
52
53
54
55
56
57
58
59
60
61
62
63
64
65
66
67
68
69
70
71
72
73
74
75
76
77
78
79
80
81
82
83
84
85
86
87
88
89
 "use client"

 import React, { useEffect, useState, useRef } from "react"
 import io, { Socket } from "socket.io-client"
 import MarkdownIt from "markdown-it"

 const mdParser = new MarkdownIt()

 const Home: React.FC = () => {
   const [docId] = useState("default-doc")
   const [content, setContent] = useState("")
   const [htmlPreview, setHtmlPreview] = useState("")
   const textareaRef = useRef<HTMLTextAreaElement | null>(null)
   const socketRef = useRef<Socket | null>(null)

   useEffect(() => {
     // Establish a WebSocket connection to the server
     const socket = io("http://localhost:3000")
     socketRef.current = socket

     // Join the default document room
     socket.emit("join-document", { docId })

     // Listen for the initial document content sent by the server
     socket.on("document-content", (data) => {
       setContent(data.content)
       setHtmlPreview(mdParser.render(data.content))
     })

     // Listen for updates to the document from other clients
     socket.on("document-updated", (data) => {
       setContent(data.content)
       setHtmlPreview(mdParser.render(data.content))
     })

     // Clean up the socket connection when the component unmounts
     return () => {
       socket.disconnect()
     }
   }, [docId])

   // Handle content changes in the textarea
   const handleContentChange = (e: React.ChangeEvent<HTMLTextAreaElement>) => {
     const newContent = e.target.value
     const renderedHTML = mdParser.render(newContent)
     setContent(newContent)
     setHtmlPreview(renderedHTML)

     // Emit the updated content to the server
     socketRef.current?.emit("edit-document", { docId, content: newContent })
   }

   return (
     <div
       style=
     >
       {/* Top title bar */}
       <div
         style=
       >
         hoonapps
       </div>

       {/* Main content area */}
       <div
         style=
       >
         {/* Markdown input area */}
         <div style=>
           <textarea
             ref={textareaRef}
             value={content}
             onChange={handleContentChange}
             style=
           />
         </div>

         {/* HTML preview area */}
         <div
           className="markdown-preview"
           style=
           dangerouslySetInnerHTML=
         />
       </div>
     </div>
   )
 }

 export default Home
Step 4. Execution
- NestJS
1
npm run start
- NextJS
1
npm run dev
Step 5. Testing
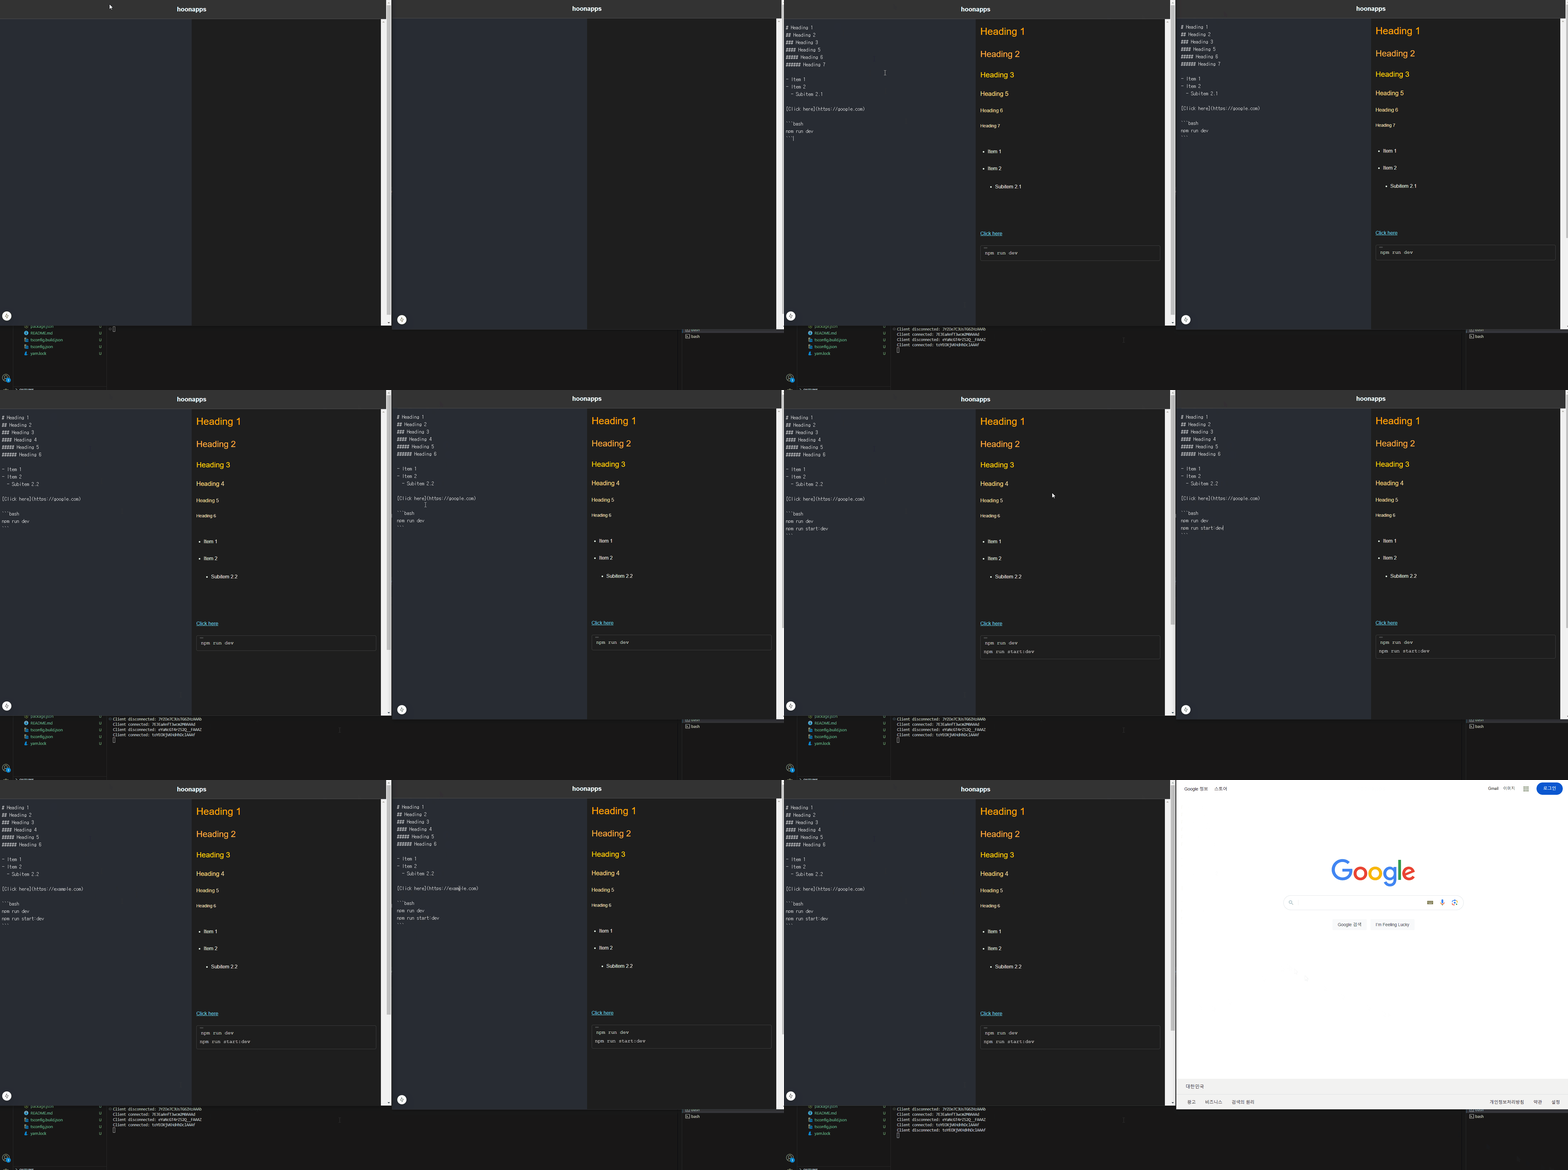
- Open two browser windows and load the same document.
- When you edit the Markdown in one window, it will update in real time in the other window.
- The Markdown text will also render as HTML in the right-hand preview pane.
Conclusion
Through this project, I gained a deeper understanding of how WebSocket operates by implementing it in a real-time Markdown editor. Additionally, I explored the underlying principles of how WebSocket works. I encourage you to try building a simple visualization to practice and enhance your understanding as well!
Thank you for reading, and happy blogging! 🚀
